Tuesday, October 27, 2020


Give Thanks With A Grateful Heart

Gratitude Journal


In this post you will have the process and all of the printables to complete a gratitude journal for first - fourth graders.

It takes some time to print, cut out and assemble . This project would be a great way to get parent volunteers involved.  Students can create the cover and even glue the writing   prompts, scripture cards, coloring pages, activity pages and assemble the journal themselves.

This is a great project to begin at school and send home for the Thanksgiving Holiday with the focus on giving thanks and growing an additude of graditude.

Cereal Box

Cut the top and bottom from the cereal box and one side panel. This leaves the front, back and side. 

3 Ring Binder 


For this journal a 9x7 3 ring binder works well. I found this one at the Dollar General.

Adding the cereal box cover to the binder.


Use a strong adhesive such as E 600 glue and reinforce the sides with clear packing tape. 


Before gluing wrap the cereal box around the binder
  matching up the spine of  the binder to the box and 
cut off the excess cereal box from the bottom and sides.


Let the cover dry overnight.

Supplies used for assembly.


When complete , the journal will contain 23 pages. 
I used colored card stock folded and cut in half to create the pages.

In addition you will need:
* Glue Stick
* Paper Cutter or Scissors
* Hole Punch
* Cover Page Printable
* Give Thanks With A Grateful Heart Printable
* Daily Gratitude Prompt Cards
* Polaroid Picture Cards
* Scripture Cards
*Coloring Pages
* Activity Pages

Pages


Pages 1-2 For coloring and adding a self portrait inside the Polaroid picture frame.

   
       Gratitude response prompts for 30 days. Inside each polaroid frame, students can create a heart to connect with the theme of the journal, " Give thanks with a grateful heart." The heart can be drawn, or cut out of paper or heart stickers placed inside the frame. 


Scripture cards for connecting the theme with specific verses.


Coloring page and Scripture activity page.


   Activity page and reflection page. Have students write their own name inside the cross, with the statement  > Gives Thanks.


Links and Printables


jpeg Printables

I designed the doodle graphics to print 5x7. The Polaroid doodle frame page will print on 8 1/2 x 11 size paper. Right click on the image to download. Trim the top and bottom to fit on the card stock.
You will need to print 8 pages ( 32 frames) of the Polaroid doodle picture frame


Saturday, August 29, 2020

Cover It Up!

COVER IT UP!

Cover up any book, journal or planner with cloth, paper or a 
Dollar Store bandana.
For this project I used one bandana, the pocket and part of the waist band from a pair of jeans, a glue gun and a sharp pair of scissors to cover a wide ruled student journal for my 10 year old Grand Daughter.
The great thing is that when she runs out of room in her journal and is ready for another one, the cover can be used over and over. 
We might even iron on some patches and perhaps I can teach her how to stitch on it.


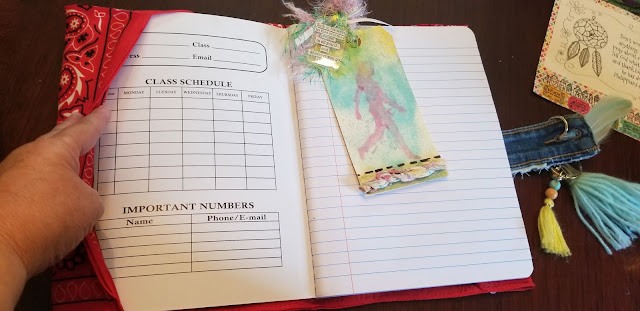
Here is a view of the back. No cutting involved or measuring.


Fold the bandana in half and hot glue the two finished long edges together. This will give you the bottom and the top of the cover.


Place the journal in the middle of the bandana. Open up the journal cover and fold over the bandana to create a pocket for the cover to slide into. Hot glue the corners .


The journal covers will fit snug inside of the pockets.


Cut the pocket from a pair of jeans.


I cut the Levi Strauss & Co. tag from the waist band.


And hot glued the tag to the pocket.


The waist band is cut into 2 pieces to form a closure for the cover with the button on one side and the button hole on the other. Both sides are glued to the back side of the pocket.


The pocket is placed in the middle of the bandana cover and hot glued. Only glue the pocket. You want the closures to be left unglued.


The pocket stays in place while the straps are free to be buttoned and un buttoned.


When closed there is enough room for expansion as things are placed in the journal.


I included a beautiful tag bookmark created by Visual Faith Ministry Webmaster Diane Marra.  At out last Visual Faith Ministry conference Diane sent dozens of beautiful tags as gifts to all who attended. This is one that I chose. I love the verse that she paired with this tag. 


I am tucking one of my Scripture Doodles in the cover of the journal. This scripture pairs well with the history of the dream catcher. 


The back of the Scripture Doodle with some fun facts about Dream Catchers and the inspiration in creating the Scripture doodle.


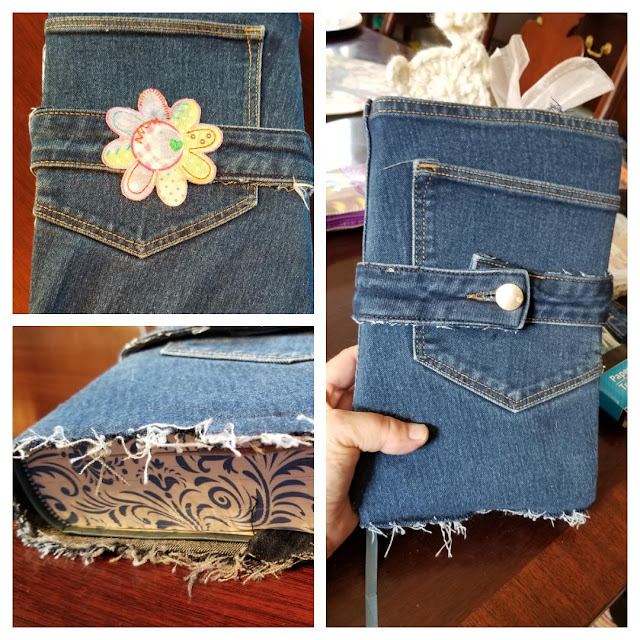
I covered the Enduring Word Bible with a pair of jeans using a similar process. I fringed the bottom edge for a vintage 60's-70's look.


I cut the waist band off to create a closure and cut the length of the jeans to cover the length of the Bible. Fold over the sides to create pockets for the covers. Glued the corners with hot glue.


The band gives room for expansion. 


She is "Double Digits" now....


....and lives 12 hours away. I can share from my heart and hands, a faith walk that she can be reminded of each time she opens her journal no matter how far away we are from each other. 


Saturday, July 25, 2020

Walking With Jesus/ New Beginnings


The New Normal. What Will It Look Like?


As we start thinking about the new school year and what the new normal will be, rest assured that we are all in this together and Jesus will walk with us down this new path.

It is on my heart to create and share with you free Christian resources and encouragement that can be used in the home, Sunday school programs and the classroom. I am a 30+ year Early Childhood Educator and presently serve as a Professional Church Worker serving families with infants - fourth graders.

Beginning in September, I will post a weekly video introducing the theme of the week, printable resources, visual prayer activities and a parent/teacher devotional newsletter.

There are 3 ways to get the link to the weekly resources.
1. On Facebook join the private group All Things Children's Ministry
2. Follow me on Instagram @beebeebost
3. Email @ allthingschildrensministry.com ( I promise not to fill your inbox up!)


As you start thinking about what will be in your teaching/learning spaces take a look at all the things you can do with cookie sheets , sheet metal and those large magnetic drip pans from Wal Mart.
I have one at home for my Grand Daughter and one
 in a classroom at church.
I have created a Pinterest board with many examples 
of how to paint and cover them.
 See the link below.


And a gift for reading all the way to the end!!!! A free Scripture Tee Shirt book mark. Click on the graphic to download and print these 4 to a page and share with friends. I like to print them poster size
 ( ledger)  mount them on poster board and hang in the classroom as well. Each month a new Scripture Tee will be posted.
 Collect them all.


Let me know how I can help you.
 Let me know how I can pray for you. God bless!
Belinda


Wednesday, April 8, 2020


Paper Resurrection Eggs


For those who do not have a set of Plastic Resurrection Eggs a paper set and a hand dandy basket can be a fun way to tell the story of the Passion during Holy Week and the weeks after Easter.

Egg Figurines


I took a photo of each Resurrection Egg figure and uploaded onto an egg shape graphic. 
Click on the graphic to down load and print.
Paper Resurrection Eggs Page #1


Page #2

Cut out each egg and number them in order 1-12 . See the list further down in the post.
Color the back of the egg to match the egg on the front.


Print the basket pattern on card stock. Color and decorate. This will be the home for the paper resurrection eggs.


Click on the pattern to download and print. To form the basket , cut on the solid lines and fold on the dash lines. Cut out the white space of the handle. Tape or glue to end pieces.

Use the scripture verses to tell the "STORY" Click on the document to download and print.

Page #2

With this set from Amazon activities are included. 

Resurrection Eggs are available on Amazon.


Belinda Bost
Children's Minister
Concordia Lutheran Church
Conover. NC 28613

Instagram @beebeebost


Monday, February 24, 2020

Got Ashes? We Do!


Got Ashes? We Do?

There are so many reasons why I love this photo. I am listing two. These girlies have been buddies for a long time. Lindy, always loving on the precious little ones, taking time to give hugs and smiling for pics. The sweet Grand Girl who received her first ashes along with her church family attending the Ash Wednesday service several years ago.

So, if you would like to have an intentional conversation with your child before ashes are imposed onto their foreheads and they are left wondering when their bodies will suddenly be turning into a pile of dust, here are some thoughts on how to communicate with children what Ash Wednesday is all about.


First, let us be reminded that Liturgical churches such as Lutherans, Methodists , Presbyterians and Catholics celebrate the season of Lent. Ash Wednesday is the first day in the season of Lent, 40 days to remember Jesus' sacrifice and to prepare us for the Easter season. This tradition was carried on by the early church and remains an important tradition today. The ashes remind the wearer of the need to repent and confess in order to be turned to God.

What Kiddos Need To Know:

Ashes are used to remind us of 3 things.
1.Our sinfulness before God.
2. Our mortality. Nobody lives forever.
3. Because of the cross of Christ, we will have the gift of eternal life.

On Ash Wednesday, a pastor may put ashes on your forehead. The ashes make us think of death. We are part of this world, and someday we will die. God created man from the dust of the earth and one day all men will return to the dust of the earth
But look, the ashes are being made into a cross, reminding us that Jesus is more powerful than the ashes of death. He beat death
 when he died on the cross and came back to life. 
When we have faith in Jesus and we believe in him in our hearts and confess with our mouths that he is Lord, we are given the gift of living in his kingdom.
Ashes mean death, but the cross means life!

On Ash Wednesday , we are reminded of hope. We are given the cross as a reminder that Jesus's victory can become our own and our lives do not have to end when our bodies turn to dust again.


I encourage you to come and bring your children to this special occasion, coming to the Lord's table during Holy Communion marked with the cross of Christ. All are welcome. We all are in need of salvation. 
Create in me a clean heart , O God and renew a right spirit within me. Psalm 51: 10


Here are some ideas to bring the season of Lent into our homes:


Make a "Pack" to pray as a family each day. P> Praise God for all the blessings that are given. Give God all the Praise and Glory for his awesomeness. His mercies are new every morning. 
A > Ask God for help, for things both spiritually and physically. Prayer is the armor we wear to protect our mind heart and soul from evil. Give prayer request on behalf of other people.
C > Confess We are are sinners in need of forgiveness, simply say, " forgive me Lord of all of my sins."
T > Thank  Give thanks in all things...the good and the not so good. Develop a heart of gratitude.

Use a  visual to count down the days until Easter. Color in each shape or add a sticker to mark the passage of days. Click on the graphic to print.

Pretzels provide a welcome activity during Lent, while teaching a bit of Christian history, baking and scripture. 

Click on the link for my Easter/Lent Pinterest board  for more celebration ideas. Lent/Easter Pinterest Board

Belinda Bost
Children's Minister
Concordia Lutheran Church, LCMS
Conover, NC 28613